A garden looks more organized and attractive when it has a clean walking path. A
well-made path helps you move around easily, protects your plants from being stepped
on, and keeps your outdoor area looking neat. It also reduces mud and mess during
rainy weather.
The best part is that you don’t need professional skills to create a path. With
basic materials and planning, you can make a stylish DIY garden path that improves
both beauty and functionality in your home garden.
Why a DIY Garden Path Is a Great
Home Upgrade
A garden path is not just decoration. It makes your garden more usable by creating
clear walking areas. It also protects grass and plants from damage and helps prevent
soil from spreading everywhere.
A path can also increase the overall look of your outdoor space. It adds structure
and gives your garden a modern or natural design, depending on the materials you
choose. If you want a simple outdoor improvement that adds value, a DIY garden path
is a smart project.
Planning Your DIY Garden Path the
Right Way
Good planning saves time and helps you avoid mistakes. Before buying materials,
decide the purpose of the path. Some paths are made for daily walking, while others
are decorative.
Measure the area where you want the path and decide the width. Most garden paths
look best when they are wide enough for one person to walk comfortably. A curved
path looks natural, while a straight path looks modern and clean. Also check your
soil and drainage. Water should not collect on the path because it can damage the
base and create slippery areas.
Best Materials for a DIY Garden
Path
Choosing the right material depends on your style, budget, and weather conditions.
Some materials look natural, while others look modern and clean.
Popular materials include gravel, stepping stones, bricks, wood slices, and concrete
pavers. Gravel paths are affordable and quick to make, while pavers look more
premium and last longer. If you want a long-lasting DIY garden path, choose
materials that handle rain and foot traffic easily.
Simple DIY Garden Path Ideas You
Can Try
There are many types of garden paths, and each design gives a different look. Choose
one that matches your home’s outdoor style.
Gravel Path for a Clean and
Modern Look
Gravel is one of the easiest choices for beginners. It is affordable, drains well,
and gives a clean finish. Gravel paths also look great in both small and large
gardens. To make it stronger, place a weed barrier under the gravel. You can also
add edging using bricks or stones to keep gravel from spreading.
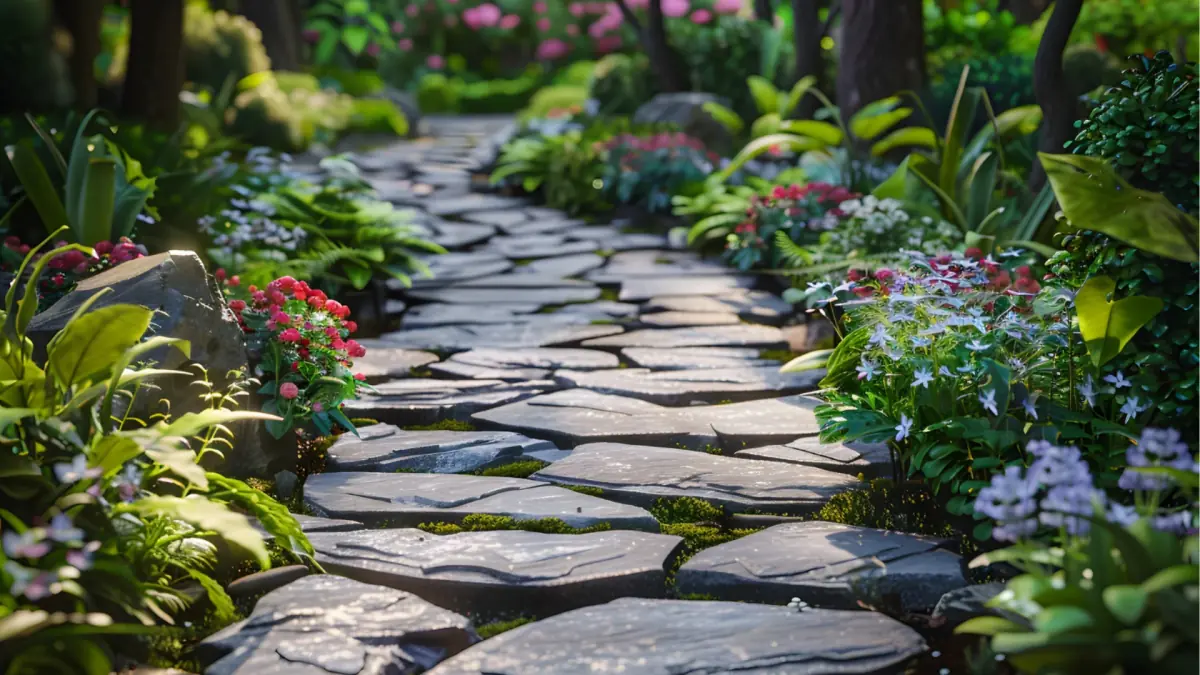
Stepping Stone Path for a
Natural Style
Stepping stones are perfect if you want a simple and natural-looking walkway. They
work well in gardens with grass or flower beds and create a neat walking line. You
can use natural stone slabs or concrete stepping stones. Keep the stones evenly
spaced so walking feels comfortable. A stepping stone DIY garden path looks
beautiful and requires very little maintenance.
Brick Path for a Classic Look
Brick paths give a traditional and elegant look to gardens. Bricks are strong,
durable, and suitable for areas with regular foot traffic. This type of path takes
more time because bricks need a stable base. However, the final look is premium and
adds strong structure to the garden design.
Step-by-Step Guide to Make a DIY
Garden Path
Now let’s go through a simple process that works for most path types. Whether you
choose gravel, stones, or bricks, the base preparation is the most important step.
Step 1: Mark the Path Area
Use rope, chalk, or garden spray paint to mark the shape of your path. Walk along it
to confirm it feels comfortable and looks balanced with your garden layout. This
step helps you avoid mistakes and ensures your DIY garden path fits naturally in
the space.
Step 2: Remove Grass and Dig
the Base
Remove grass and soil from the marked area. Dig deep enough to add a base layer and
the path material on top. The depth depends on the material you choose. A proper
base keeps the path stable and prevents sinking over time.
Step 3: Add a Weed Barrier and
Base Layer
Place landscape fabric or weed barrier to stop weeds from growing through your path.
Then add a base layer like crushed stone or sand to support the top material. Level
the base properly using a wooden board or tool. A strong base improves durability
and keeps the path flat.
Step 4: Place Your Path
Material
Now place the material such as gravel, stepping stones, or bricks. If using stepping
stones, press them slightly into the base so they stay stable. If using bricks,
align them neatly for a clean look. Take your time during this step because
alignment and spacing affect the final look of your DIY garden path.
Step 5: Final Touches and
Edging
After placing the material, add edging if needed. Edging helps keep gravel in place
and gives a clean border line. For gravel paths, add an extra top layer and rake it
evenly. For stone and brick paths, fill gaps with sand or small gravel to lock
everything in place.
How to Maintain a DIY Garden Path
A garden path stays beautiful when you maintain it lightly. For gravel paths, you
may need to add more gravel after some months and remove weeds if they appear. For
stepping stones or bricks, clean them with water and a brush when dirt builds up.
Also check for uneven stones and adjust them to prevent tripping. A well-maintained
DIY garden path stays clean, safe, and attractive for years.
Common Mistakes to Avoid
One common mistake is skipping the base layer. Without a strong base, the path
becomes uneven and sinks over time. Another mistake is not using a weed barrier,
which allows weeds to grow and ruins the path’s look. Some people also choose the
wrong material for their garden. For example, wood may rot quickly in wet climates,
and loose gravel may spread without edging. Proper planning prevents these problems
and helps your path last longer.
FAQs
What is the easiest DIY garden
path to make?
A gravel path is one of the easiest options because it
needs fewer tools and drains well. It also works well for most garden
styles.
How wide should a garden path
be?
Most paths should be wide enough for one person to walk
comfortably. A common width is about 2 to 3 feet, depending on your space.
Do I need a weed barrier under
the path?
Yes, a weed barrier helps prevent weeds and keeps your
path clean. It also makes maintenance much easier.
Can I make a DIY garden path
without digging?
Some paths can be made with minimal digging, especially
stepping stone paths on grass. However, digging a base improves stability
and
long-term results.
How long does a DIY garden path
last?
With proper base preparation and durable materials, a
garden path can last for many years. Maintenance also helps extend its life.
Conclusion
A DIY garden path is a simple project that adds structure, beauty, and cleanliness
to your outdoor space. It makes walking easier, protects your plants, and improves
the overall look of your garden.
With the right material, good planning, and a stable base, you can create a path
that looks professional and lasts for years. Start small, choose a design that
matches your garden style, and enjoy a cleaner and more organized outdoor space.